Well, you may notice greasy fingerprints, hair, and food crumbs stuck between your keys. If that’s the case, it’s time for you to clean your gaming keyboard. Unlike regular rubber-dome keyboards, the mechanical ones have a switch under each key. So, cleaning your gaming keyboard can be tedious if you do not follow the right steps. But, you do not have to worry! In this article, we have provided the step-by-step procedure on how to clean gaming keyboard.
Tools to Clean a Gaming Keyboard
Before cleaning a mechanical gaming keyboard, you need to assemble several tools to make your work easier. In this section, we have listed everything you need and its importance when you’re cleaning the peripheral.
Microfiber Towel
Whether you clean your keyboard or any other device, it’s best to use a microfiber towel. This is because they are made of nylon or polyester that can lift and hold dust for a longer time. Well, dust or stains always retain on keyboards no matter how often we clean them. Hence, we recommend using a wet or dry microfiber towel as they can remove almost 99% of germs and bacteria. So, it’s pretty clear that using this over a general cleaning cloth is a smart choice.
Cleaning Brush
A cleaning brush is another important tool that helps you clean your mechanical gaming keyboard. Like a microfibre towel, a brush can help wipe away dust quite easily. Well, we recommend getting a small brush to help you clean the corners of the keys. Also, this can be useful when cleaning those areas a microfiber towel can’t reach.
Cotton Buds
Mostly, cotton buds are meant for cleaning the inner parts of the keys and switches. When a microfiber cloth and a cleaning brush can’t help you, it’s best to use this. Well, we recommend getting cotton buds when you’re deep cleaning your mechanical gaming keyboard. But, if you’re just looking to clean the dirty spots on your peripheral, using a microfiber towel or brush should do.
Keycap Puller
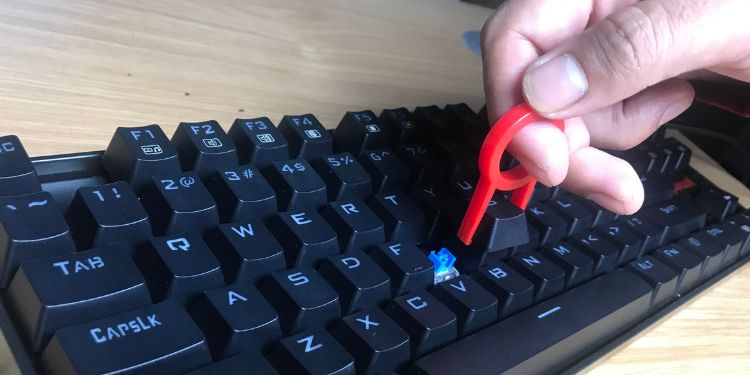
Interestingly, the keycaps on a mechanical keyboard are quite easy to remove. In fact, some prefer removing them with their bare hand. However, when doing so, you may not know the right technique and pull it along with its switch. Apart from that, some users report breaking their nails while doing so. Hence, we recommend getting a keycap puller, which is easily accessible in the market and is surprisingly cost-friendly.
Isopropyl Alcohol
Generally, we can use 90% isopropyl alcohol while cleaning a mouse or keyboard. This rubbing alcohol can help remove any stains, no matter how rigid they are. Interestingly, they work as a disinfectant and help kill germs and bacteria from the mechanical gaming keyboard. However, the isopropyl alcohol is flammable and can cause short-circuiting on the device if left wet. So, we recommend drying your gaming keyboard before using it. Moreover, isopropyl alcohol can be allergic to some users. In such a case, we suggest using it in a small amount. Else, it’s best to use an alternative liquid, like water, for your safety.
Cleaning Gel
A Cleaning Gel can be handy to remove any debris that’s stuck inside your keys. Well, they work like magic by absorbing all the unnecessary dirt particles. Interestingly, you can get a cleaning gel from the market at an affordable price. Also, the slime is reusable and can be used until it becomes a bit dark.
Cleaning Solution
Unlike cleaning an LCD monitor, you can prepare a cleaning solution using soap or detergents for keyboards. You can simply mix these products with water before cleaning the keycaps. Indeed, it’s pretty safe to use household cleaners for mechanical gaming keyboards. But, do not pour the solution directly as it may damage the switches. Instead, slightly dampen a microfiber towel and clean the greasy areas.
Keyboard Switch Lubricants
Plenty of lubricants for cleaning keyboard switches are available in today’s market. Applying these products can reduce the bumps and make your mechanical gaming keyboard fun to use. Mostly, we apply lubes or oils in the switches and stabilizers. This way, your keyboard acoustics are improved, and actuation becomes smoother.
A Pair of Tweezers
This might surprise you as you may wonder what’s the use of a tweezer while cleaning a mechanical gaming keyboard? However, the truth is that this tool can help pick up hair stuck inside the keycaps. Thus, tweezers are a must if you have a hair fall problem or a pet dog/cat.
Compressed Air
Finally, we recommend using compressed air if you’re trying to dry the keycaps or the keyboard itself. The Air also does a wonderful job of clearing the loosely stuck dirt and dust particles. Undoubtedly, a can of compressed air is an excellent tool to clean dust from PC. So, you can even use this to dry your keyboard after cleaning or even when you accidentally spill water.
How Can I Clean a Mechanical Gaming Keyboard?
Cleaning your mechanical gaming keyboard depends on how dirty it is. If it hasn’t been cleaned for years, you may need to deep clean it. So, without further do, let’s jump into the important steps on how to clean a mechanical gaming keyboard.
Unplug Keyboard Cable
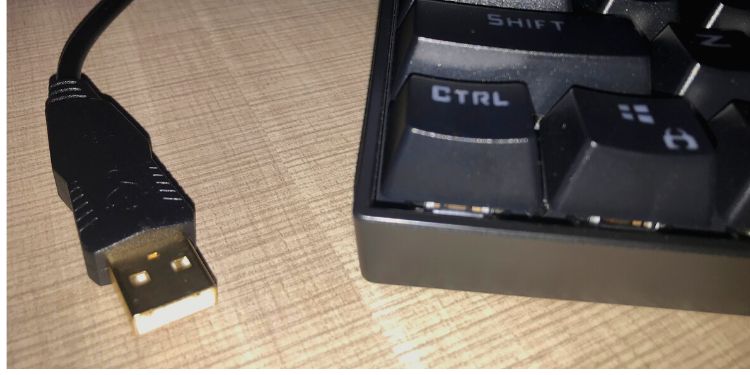
If you’ve spilled water or coffee on your mechanical gaming keyboard, the first step is to remove the cable connectors. Also, since we will use water and isopropyl alcohol in this guide, we suggest unplugging your device from the CPU or laptop. Well, if water enters the keyboard circuit and the power supply hasn’t been cut off, there’s a risk of getting an electric shock. This implies water-resistant gaming keyboards too. Hence, we recommend unplugging the keyboard cable for your safety. Do not plug in until the keyboard is completely dry.
Flip and Shake Your Keyboard
The next step is to flip and shake your keyboard to remove heavy food particles. Then, shake your device to remove excess debris stuck in the keycaps. Also, you can flip your keyboard downwards to prevent liquid from entering the power supply. Once enough liquid is dried, you can move on with the other steps below.
Remove Dust Using a Microfiber Towel
Even after flipping and shaking, dust and spots are still prevalent on your mechanical gaming keyboard. So, we recommend wiping the surface once using a microfiber towel. Moreover, you can slightly dampen the cloth and put pressure on your keyboard to remove the smudges. Once done, let it dry, and you’re ready to use your input device again.
Eliminate Dust Stuck Inside Your Keys Using a Cleaning Gel
Indeed, removing dust using a microfiber towel can do your job in a few minutes. However, this won’t work if dust and other particles are stuck in different parts of the keyboard. So, you can use the cleansing gel to remove the excess dust from your mechanical gaming keyboard:
Unpack the cleaning gel gently such that no part of the slime remains inside the packet.Place the gel first on the left part of the keyboard. Expand it slightly, ensuring it doesn’t break. Wait a minute or two and slowly remove the gel, making sure it doesn’t stick to the keys.Repeat the same process on the right part of your gaming keyboard.
Remove & Clean All Keycaps
We are pretty much sure the cleaning gel has successfully made your mechanical gaming keyboard cleaner than earlier. However, it’s impossible to check if the keycaps and the inner surface are also clean as expected. So, it’s better to remove each keycap and clean them separately. To do so, you need a keycap puller:
Clean the Keyboard Surface Below the Keycaps
Undoubtedly, you’ll notice all the fur, dust, and food crumbs beneath the keycaps once you remove them. Now, clean the keyboard surface following the general steps below:
Lubricate the Keyboard Switches
Sometimes, your keyboard may malfunction due to dust stuck in the switches. So, you can lubricate them one by one to solve the problem and improve the keyboard acoustics too. Here’s how you can do just that:
Use a switch opener to open a desired key’s switch.Take a lubricant and a small brush to lubricate the bottom housing of the switch first.Next, lubricate the two ends of the spring.Also, lubricate the stem of the switch. If you’ve got a stem holder, that would be an advantage.Once all the three parts are lubricated, join them together.Finally, repeat the same process for all the key switches.
Place the Removed Keys Back
Once all the switches are lubricated, we first let them dry using compressed air. You could also use a dry microfiber towel again. Once your keyboard is completely dry, look at the picture you clicked earlier to place the removed keys back.
Plug In and Test Your Keyboard
The final step is to check whether your keyboard is clean or not. Also, we need to test whether it works fine and has no problems. So, connect your keyboard to your PC. Finally, use any text editor to check whether your mechanical gaming keyboard is working fine. Also, you can open any game and see if you have smooth control.


